Multi-factor authentication
Multi-factor authentication (MFA) increases the security of browser logins. MFA is not enabled by default.
Enable multi-factor authentication
Section titled “Enable multi-factor authentication”To enable MFA, follow these steps:
-
Open the Weaviate Cloud console.
-
Click on the
Accountdropdown menu in the lower left corner of the console (1). -
Select
Account Settings(2). -
Click on
Enable MFAbutton (3 ).
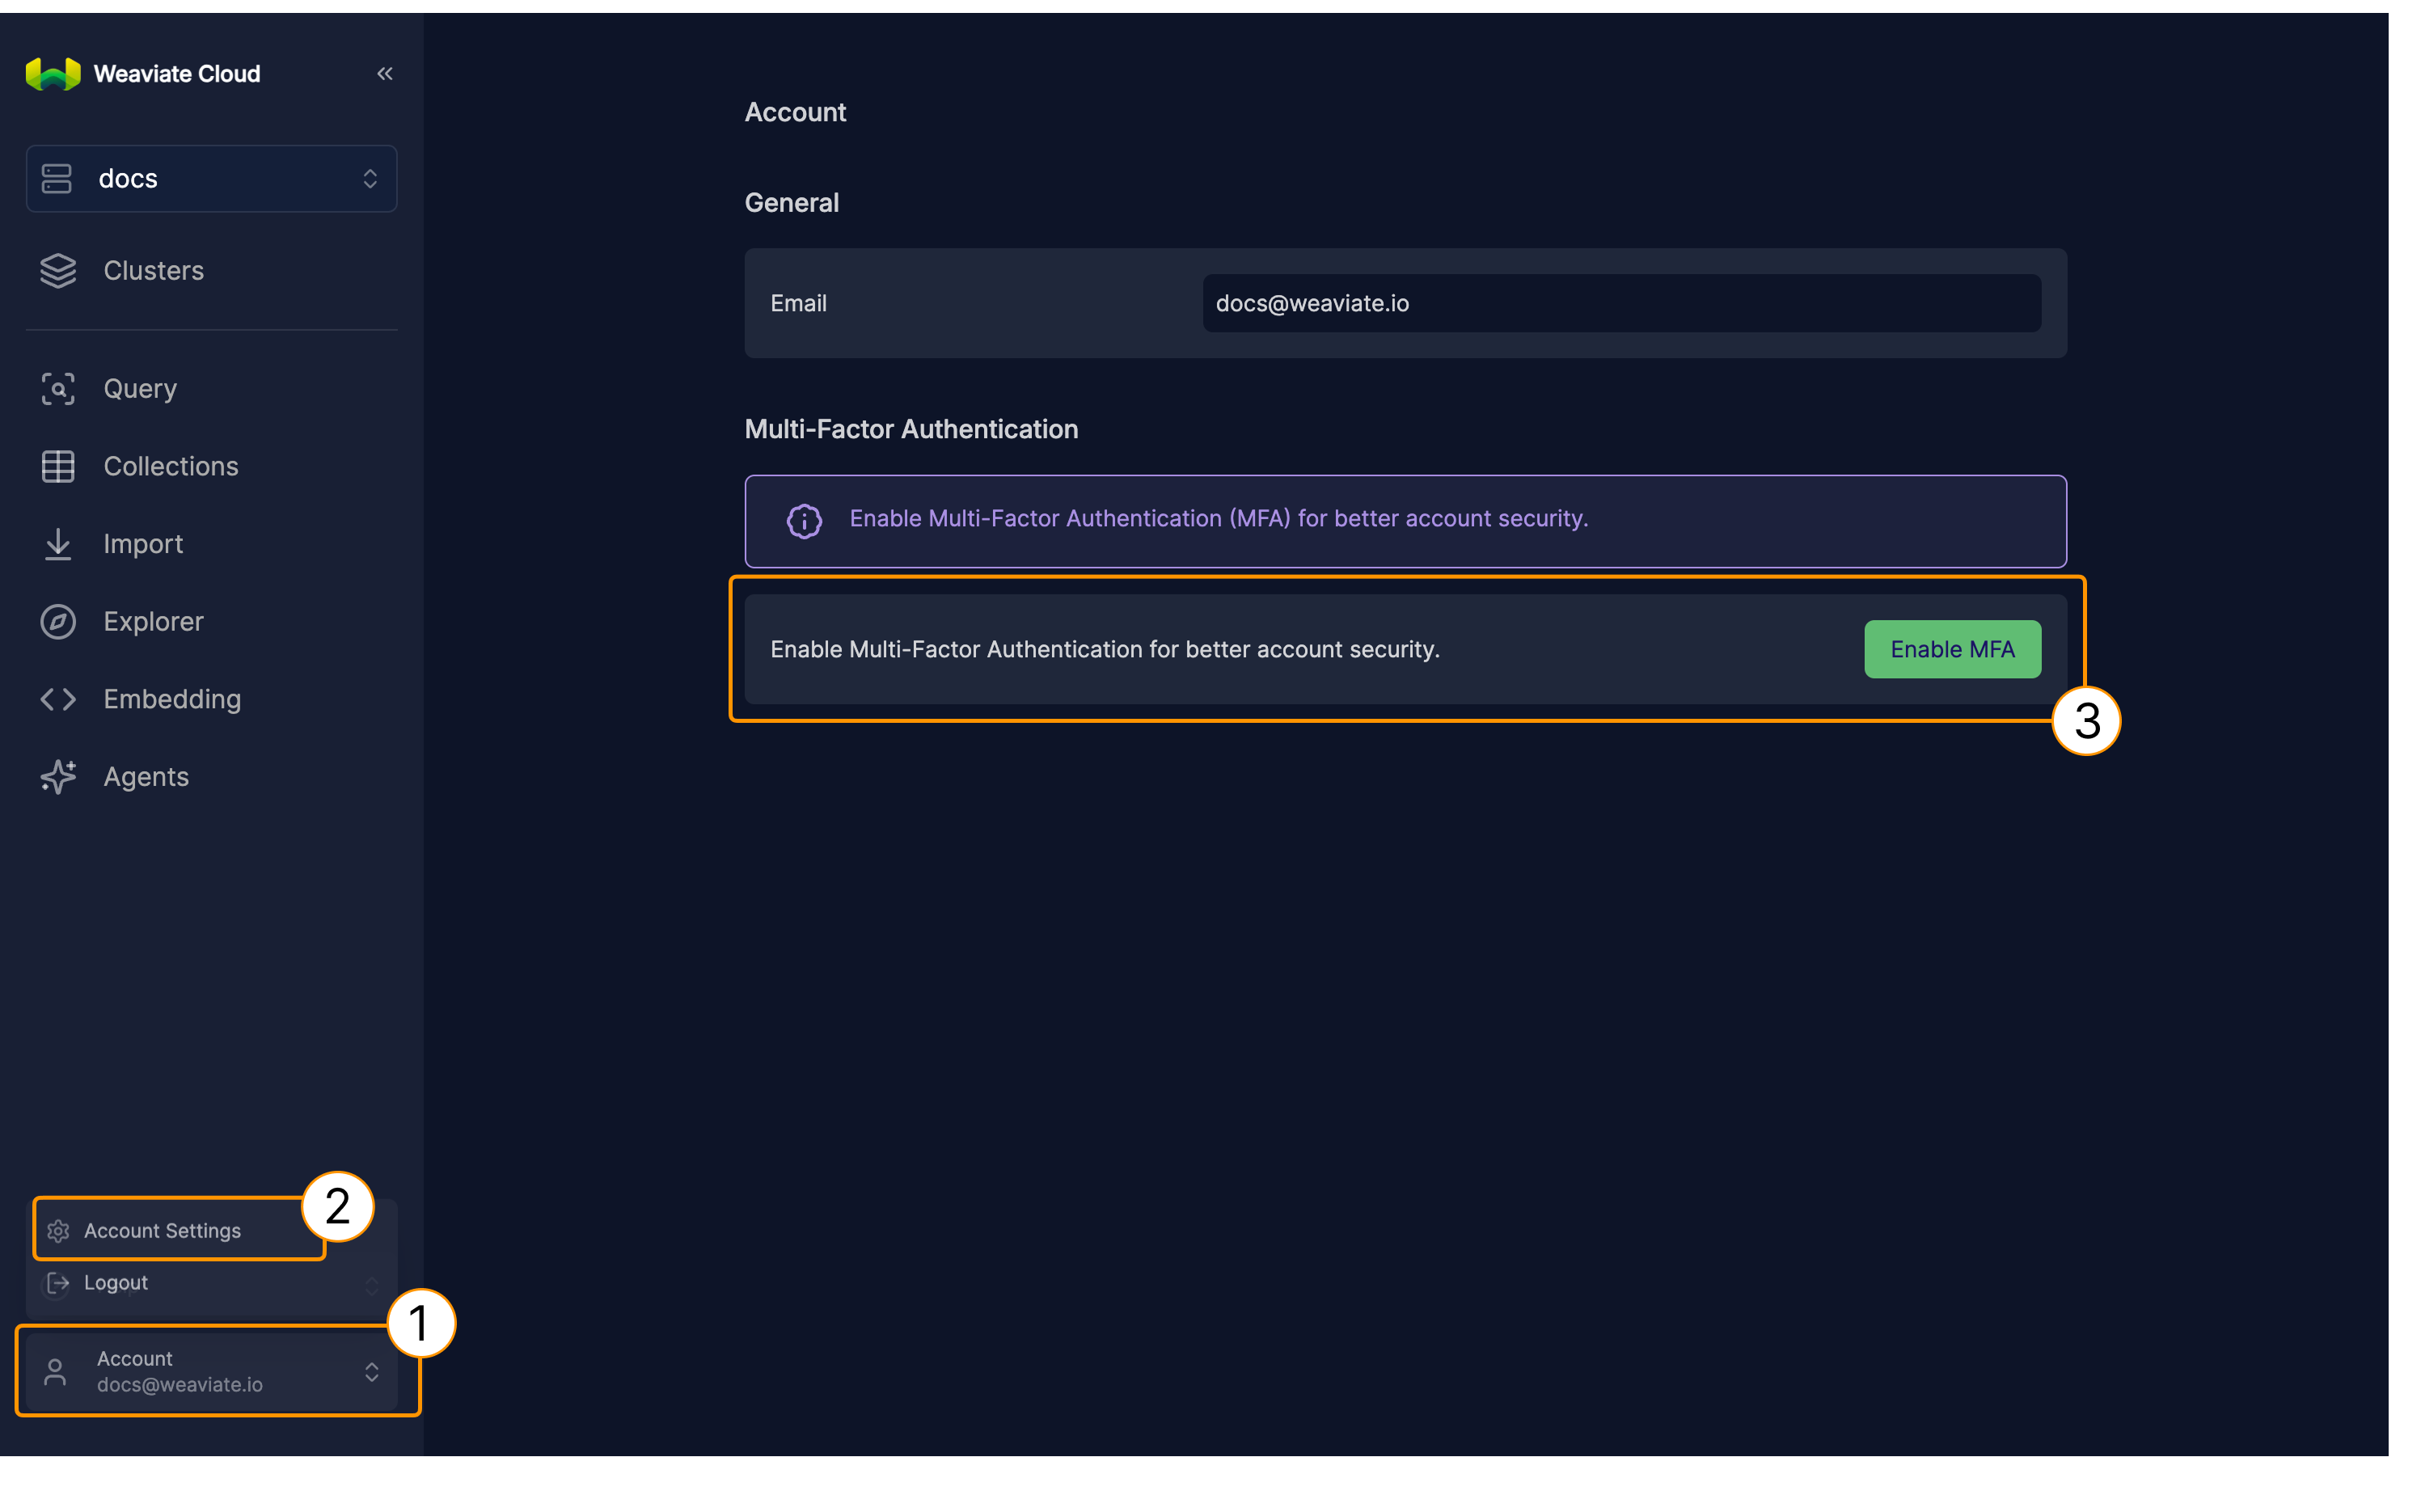
Open the Multi-factor authentication page and find the
Enable MFA button.
-
Open your authenticator application and scan the QR code ( 4).
-
Enter the one-time code from your application ( 5).
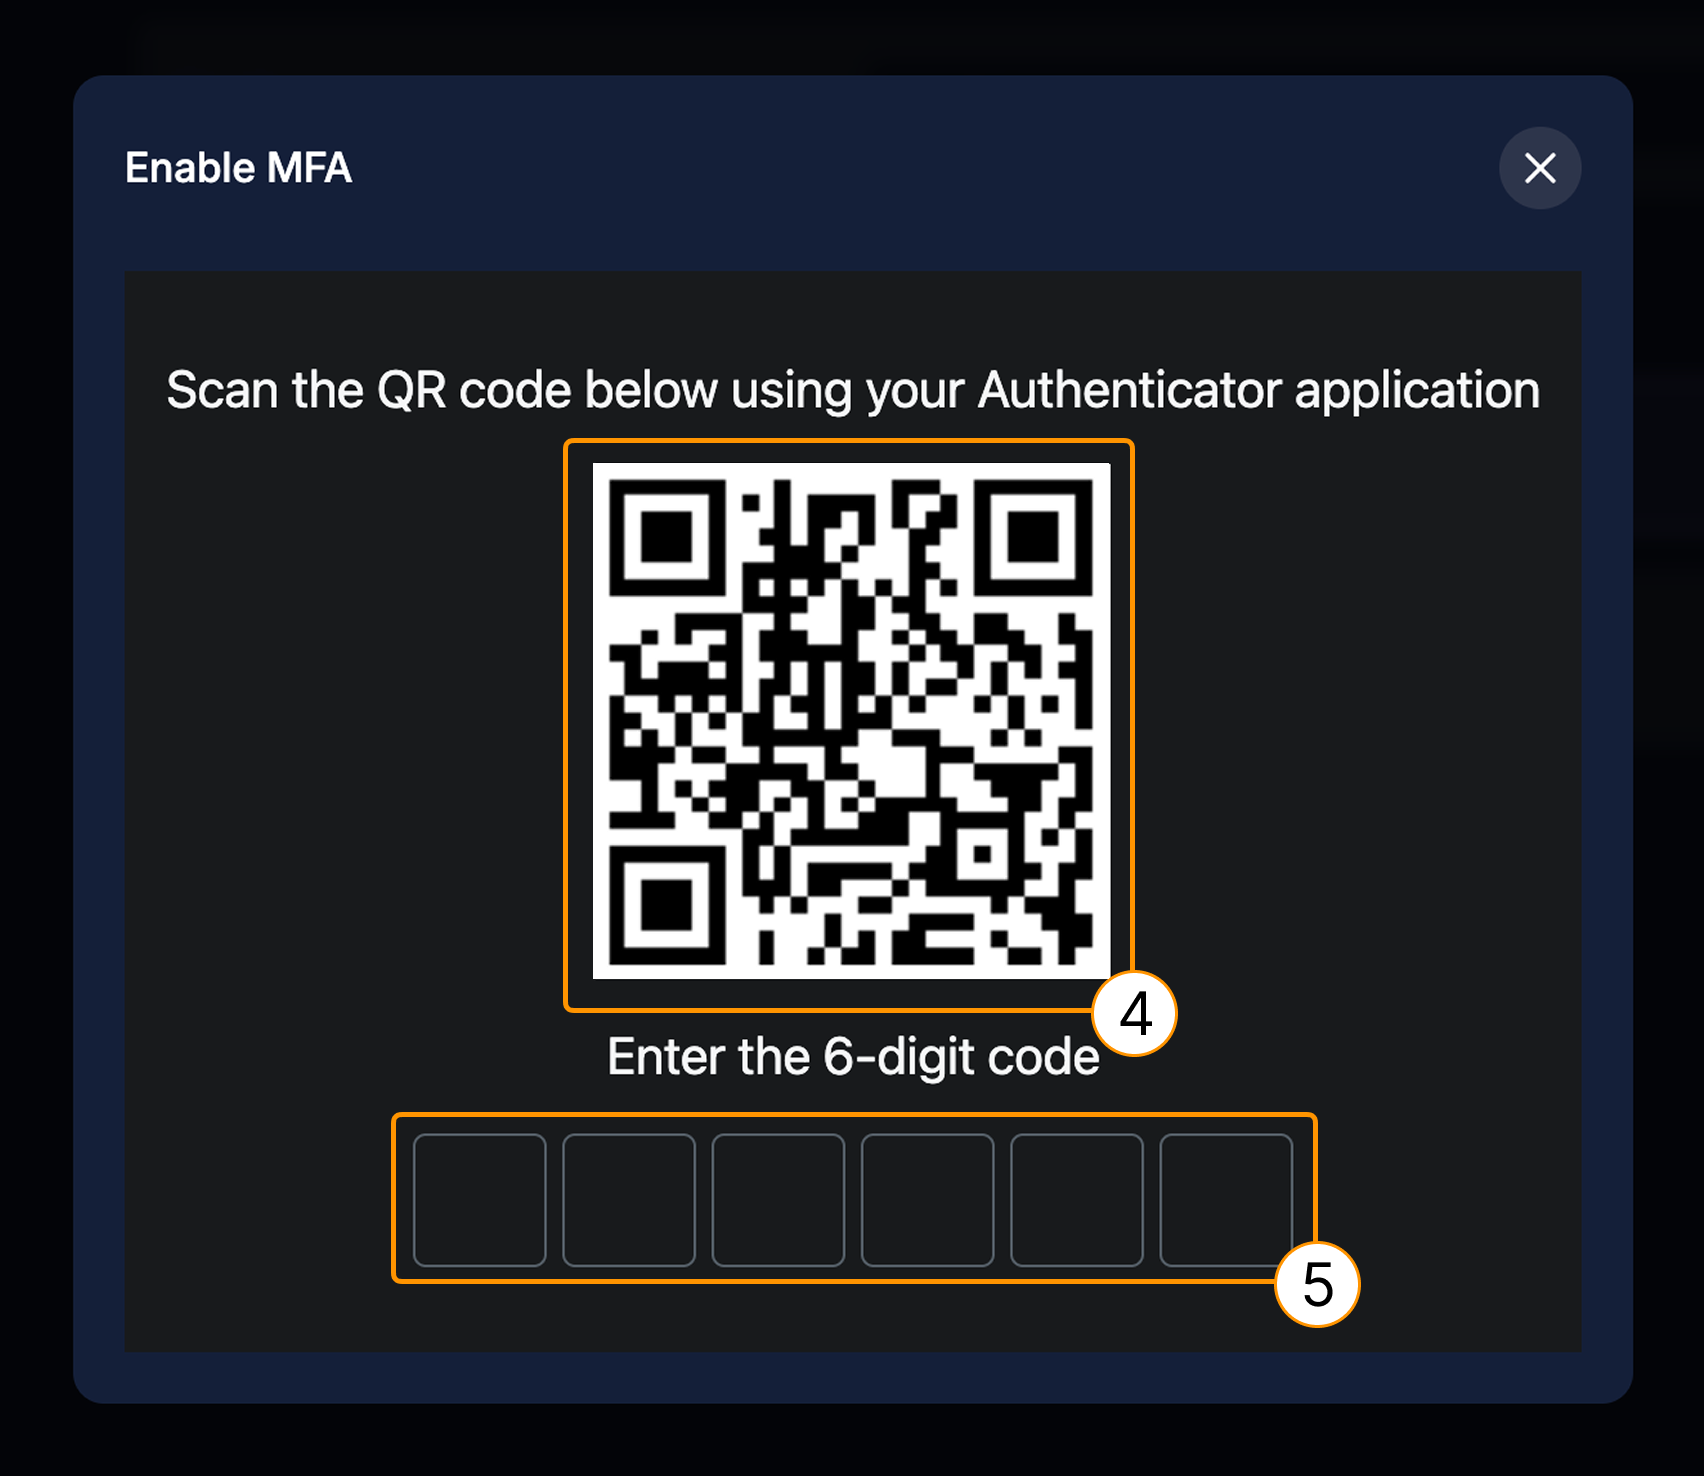
Set up Multi-factor authentication.
After you configure MFA, Weaviate Cloud prompts you to supply the one-time authentication code each time you log in.
Disable MFA
Section titled “Disable MFA”To disable MFA, contact support.
MFA and applications
Section titled “MFA and applications”If you use a JavaScript/TypeScript client to connect a browser hosted application to Weaviate, do not enable MFA for that client's account.
There is no way to pass the one-time authentication code to the application, so the application cannot connect to Weaviate Cloud.
Use API keys to connect browser based client applications to Weaviate Cloud.
Support
Section titled “Support”If you use Weaviate Cloud (Database cluster(s) or Weaviate product in the cloud) or have a self-hosted support package, open a ticket in the Support Portal or email Weaviate support directly. To add a support plan, contact Weaviate sales.
Use the Support Portal for direct help from the Weaviate team: open and track tickets, and we'll respond in line with your support plan. The Community Forum is open to everyone, and a great place to ask questions, get help with your cluster, and connect with other developers. For all the ways to get help, see the Support overview.